Pages

Monday, June 20, 2011

MySql Installation on Linux

MySQL

MySQL is a Relational Database Management System (RDBMS) that runs as a server providing multi-user access to a number of databases. For more information on MySQL, you can visit their website at www.mysql.com.

Version

This documentation was written for MySQL 5.0.45 but may be usefull with other versions.

How to install MySQL

  1. Install MySQL
    yum install mysql-server mysql php-mysql

How to configure MySQL

  1. Set the MySQL service to start on boot
    chkconfig --levels 235 mysqld on
  2. Start the MySQL service
    service mysqld start
  3. Log into MySQL
    mysql -u root
  4. Set the root user password for all local domains
    SET PASSWORD FOR 'root'@'localhost' = PASSWORD('new-password');
    SET PASSWORD FOR 'root'@'localhost.localdomain' = PASSWORD('new-password');
    SET PASSWORD FOR 'root'@'127.0.0.1' = PASSWORD('new-password');
  5. Drop the Any user
    DROP USER ''@'localhost';
    DROP USER ''@'localhost.localdomain';
  6. Exit MySQL
    exit

Thursday, June 16, 2011

Windows server 2003 R2 standard crack activation

1. Click on Start button.
2. Click on Run.
3. Type regedit into the Run text box and press Enter.
4. Navigate to the following registry key:
HKEY_LOCAL_MACHINE\SOFTWARE\Microsoft\Windows NT\CurrentVersion\WPAEvents

5. Note: From this step onward, the cracking process must be performed as quickly as possible, as it hacks activation stuff and Windows may change back the setting if there is a delay of more than few seconds.

Locate a string value named OOBETimer.
6. Right-click on OOBETimer, and click on Modify.
7. Change the value to FF D5 71 D6 8B 6A 8D 6F D5 33 93 FD.

Activation OOBETimer
8. Click on OK.
9. Right-click on WPAEvents and select Permissions?.
10. Click on Advanced button.
11. Uncheck the check box for Inherit from parent the permission entries that apply to child objects. Include these with entries explicitly defined here.
12. Click on Apply.
13. When prompted, click COPY.
14. From there, highlight the SYSTEM line, and click Edit.
15. Choose the Deny option to ban all users from accessing and editing the key.
16. Click on OK.
17. Reboot the computer.

After the hack, Windows Home Server should run completely as a free copy, with users able to access Windows Update to get latest hotfixes and patches. The crack does not require BIOS mod.

To verify that the activation crack works after restarting the system, go to Start -> All Programs -> Activate Windows. The dialog should say Windows is already activated. Alternatively, go to Start -> Run and type oobe/msoobe /a.

Note: Some users reported that the method does not actually remove the activation grace period, even though it makes the system activated.

Friday, June 10, 2011

Putty Connection Manager Configuration

Putty Connection Manager can be used as tabbed version of Putty. It works on all the editions of Windows OS i.e Windows XP, Server 2003,Vista, Server 2008 and Windows 7.This article describes how to use Putty Connection Manager to simplify the login process to different telnet or ssh servers. Please follow the below given steps.

  • Launch Putty Connection Manager. It asks for the location of Putty.exe. Specify the location and press OK.
  • Now you can see Putty connection manager window as shown below.


  • Now the first thing we need to do is creating a database where we can store information of hosts and login parameters like username and user password. For this Click on File then New and then Database. Give some name to the database and create the database.
  • The next thing is to create a connection. Click on File and New and then Connection.
  • Specify connection name and remote sever name. Select the check box Enable Login Macro Mode

  • Now select Login Macro from the left side pane. Enter username and password using which you want to connect to the remote computer.

  • Click on Apply and OK
  • Next it asks for destination folder. Select SSH or Telnet depending on the connection type.
That's all you need to do. After dong the above steps you can see connection manager mini window on the right side where you can see an entry for the connection we just created. If you do not see this you can make it visible by clicking on View and then clicking on Connection Manager. In the connection manager mini window double click on the connection name and it will open a putty session to the host specified in the connection settings. It will automatically supply username and password to the remote host. With in 2 to 3 seconds you can see command prompt of the remote machine.

I have started using this tool very recently and have liked it very much. One problem I have faced with this tool is that sometimes it supplies the password as username. After googling I have found that other users are also having this issue. Whenever I face this I just close the window and open a new window.

Keyboard Shortcuts:
Puttycm provides keyboard shortcuts to switch between tabs and to open new windows. These default keyboard shortcuts can also be reset. You can do this as follows.
Click on Tools in Puutycm window
Click on Options
Now click on Hotkeys.


To redefine the shortcut for any operation select the operation entry from the list and then use the New shortcut box provided in the bottom.

Some questions asked by blog readers regarding Putty Connection Manager.(PuttyCm.exe)

When I minimize Puttycm window it disappears. I can't reactivate the window using ALT-TAB too. If I try to start the application again it says 'Application already started'. How to fix this?

This can be fixed by changing Puttycm settings. Go to the menu bar, click on Tools and then Options.
Select General from the options in the left side pane. Now in the right side you can see the check button 'Hide when minimized'. In this case this would have been enabled. Unselecting this button will solve the problem.

Above tip has solved my problem. I am having one more issue now. After I minimize Puttycm windows if I try to reactivate the window by clicking on the Puttycm icon in the taskbar, it does not activate the window sometimes.

This is another known problem. You just need to use ALT-TAB to restore the window. Sometimes it does not open immediately even after pressing ALT-TAB once. Try doing it again and it will work.

I created a database and created new connections. But I do not see the connections after reopening puttycm, what happened with the old database I created?

Looks like you did not save the database. After creating a new database and new connections, you might think that all the changes are saved but they are not. You have do explicitly save the database changes by clicking on File from the menu bar and then selecting Save Database.

How to encrypt the database file? Storing passwords in plain text could be a security issue?

There is no in-built feature to encrypt database looks like. There is a check button 'Enable database encryption' in Database-> Properties but it's greyed out. May be the feature is not yet implemented.

But you can encrypt the database file using Windows EFS feature if you have a OS edition that supports the feature(XP home does not support EFS). Just right click on the file and Properties -> Advanced. Select the check button 'Enable encryption to secure data'.

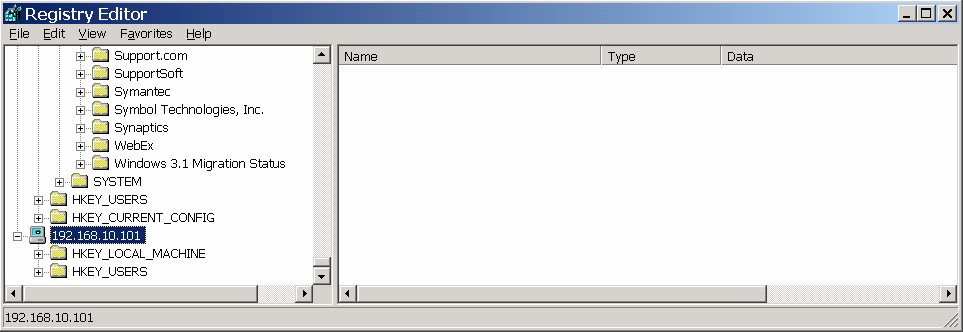
Where are Puttycm's registry keys stored ?

You can find Putty connection manager's registry keys under the node HKEY_CURRENT_USER\Software\ACS\PuTTY Connection Manager

How to disable Ctrl-R binding? Ctrl-R is a shortcut for searching command history in linux. But doing Ctrl-R in Puttycm opens up tab rename window. How to fix this?

Open Tools -> Options -> Hotkeys. Change the shortcut for rename tab to something else. You would be able to search command history now.

Thursday, June 9, 2011

Downloading & Installing the vSphere Update 1 Client For Windows 7

As we pointed out earlier in the week, vSphere Update 1 now supplies a Windows 7 compatible client, one that works out of the box. However, There are some folks who have not jumped into Update 1 yet, but still need to manage vSphere hosts. Not a problem you might think, and try to hop over to the VMware site to get it. Excepting, it’s not quite there, at least not without being a few clicks deep. So how do you get it? Well…

1. Download ESXi (Register if you must)

2009-11-26_2044

2. On the binaries screen, select the client download (Yes it is 100MB, no it will not kill you):

2009-11-26_2047

Make sure to save it to your desktop. This will be important.

3. Unblock it (Right click, Properties(This is why we saved instead of ran)):

2009-11-26_2111

4. Run As Admin:

2009-11-26_2114

5. Follow the rest of the install:

2009-11-26_2116

Note: J# takes… a…. while…

6. Fire it up:

2009-11-26_2131

7. And done!

2009-11-26_2134

Wednesday, June 8, 2011

Resolved SSL Error 78: Server certificate could not be checked for Revocation

1) Press Windows + R button and type on regedit and press the enter button.

2) Got to the below location on registry

HKEY_CURRE
NT_USER\Software\Citrix\ICA Client\Engine\Lockdown Profiles\All Regions\Lockdown\Network\SSL

3) Under right pane set to SSLCertificate Revocation CheckPolicy=NoCheck

Now Try to connect to the client system.

Saturday, June 4, 2011

Easy way to install webmin on CentOS 4

Webmin is a web based control panel for system administrators for Unix/Linux. I use Webmin for reports mainly. More about Webmin here.

This is how you would install Webmin on Centos 4.

1. First start by downloading the latest version of Webmin. The current version is 1.400.

I prefer to use use wget to directly download the file onto the server but it’s up to you.

wget http://prdownloads.sourceforge.net/webadmin/webmin-1.400-1.noarch.rpm

2. Install the Webmin rpm package.

rpm -ivh  webmin-1.400-1.noarch.rpm
[root@proxy0 /]# rpm -ivh webmin-1.400-1.noarch.rpm
warning: webmin-1.400-1.noarch.rpm: V3 DSA signature: NOKEY, key ID 11f63c51
Preparing... ########################################### [100%]
Operating system is CentOS Linux
1:webmin ########################################### [100%]
Webmin install complete. You can now login to https://proxy0.klm1.netcel360.com:10000/
as root with your root password.

3. Check if the Webmin service has been started.

service webmin status
[root@proxy0 /]# service webmin status
webmin (pid 4878) is running

That’s it, you can now login using your root id at https://localhost:10000

List downloads on Sqlexpressprofiler.

http://code.google.com/p/sqlexpressprofiler/downloads/list?can=1&q=&colspec=Filename+Summary+Uploaded+ReleaseDate+Size+DownloadCount

How to enable Remote Desktop remotely

In a case you want to remote access a Windows XP professional workstation and the computer Remote Desktop is not enabled, or no one over there to help you to enable it, you may have an option to enable Remote Desktop remotely by using regedit.

To enabling Remote Desktop using regedit, follow these steps:

  1. Run REGEDIT from Start>Run
  2. Click on File, then select Connect Network Registry
  3. Type the remote computer IP or host name in the Enter the object name to select and the click OK.

4. If you don't have permission to access the remote computer, the logon screen will show up. Type the username and password for the remote computer. Then click OK.

5. Now, the remote computer is listed in the Registry Editor.

6. Browse to HKEY_LOCAL_MACHINE\SYSTEM\CurrentControlSet\Control\Terminal Server, in the right panel, seelct fDenyTSConnection (REG_DWORD). Change the value data from 1 (Remote Desktop disabled) to 0 (Remote Desktop enabled).

7. Close the regeidt and connect remote system.

This copy of Windows must be activated before you can log on

Boot into "Safe Mode". To do this, turn the laptop on and press F8 as it is booting up. Go into "Safe Mode" by choosing the "Safe Mode" option.
Once you are at the desktop in "Safe Mode", Click "Start" then click "Run".
At the run command prompt type the following EXACTLY

rundll32.exe syssetup,SetupOobeBnk

*NOTE: The "Oo"'s in Oobe are "oh's" - not "zero's" There is one space after rundll32.exe. It is case sensitive as far as I know.

Click OK

Wait a few seconds - the screen may blip a few times or so.

This just reset Windows Activation for 30 days.

Reboot the PC into normal mode - log in - re-activate Windows

Step by step procedure for installing Sarg Log Analyzer

Installation of the sarg log analyzer:

1) Download the packeg to "/usr/local/src" directory
cd /usr/local/src
wget -nd http://downloads.sourceforge.net/project/sarg/sarg/sarg-2.2.3.1/sarg-2.2.3.1.tar.gz

2) Untar the packeg by following command
tar -xvzf sarg-2.2.3.1.tar.gz

3) Compile the sarg package
cd sarg-2.2.3.1
./configure
make
make install

4) Edit configuration file as shown bellow
vi /usr/local/sarg/sarg.conf

# TAG: access_log file
# Where is the access.log file
# sarg -l file
#
access_log /opt/safesquid/safesquid/logs/access/access.log

# TAG: title
# Especify the title for html page.
#
#title "Squid User Access Reports"
title "Safesquid User Access Reports"

# TAG: output_dir
# The reports will be saved in that directory
# sarg -o dir
output_dir /var/www/html/sarg

5) Make output directory for sarg report
mkdir /var/www/html/sarg
All report are genrated in this directory

6) To Generate the logreport, simply run the command
sarg

7) To generate the log report by the cron job you can make entry in "/etc/crontab" file
00 23 * * * root /usr/bin/sarg

It will generate the log report every day at 11.00 P.M

8) You can also see all command line switches by following command
sarg -h

9) Example To genrate report by manually :->

# If you want log report of the 10/11/2007 date you can give the command
sarg -d 10/11/2007 (dd/mm/yyyy)

# If you want log report from 10/11/2007 to 10/12/2007 then run this command
sarg -d 10/11/2007-10/12/2007 (dd/mm/yyyy-dd/mm/yyyy)

10) To view the log report generated by sarg start httpd serverice

/etc/init.d/httpd start

And browes url "http://ip_of_linux box/sarg" eg.
http://10.0.0.1/sarg

See sample report

Also see -
Script for generating Sarg Log Reports
Sarg Real-Time Log Configuration